

Have you ever wondered how whey protein is made? If you’re looking to understand what goes into this popular supplement, you’re in the right place.
Knowing how whey protein is created can help you make smarter choices about what you put in your body. You’ll discover the simple steps behind making whey protein and why it’s such a powerful source of nutrition. Keep reading to unlock the secrets of this muscle-building ingredient and see how it can fit into your daily routine.

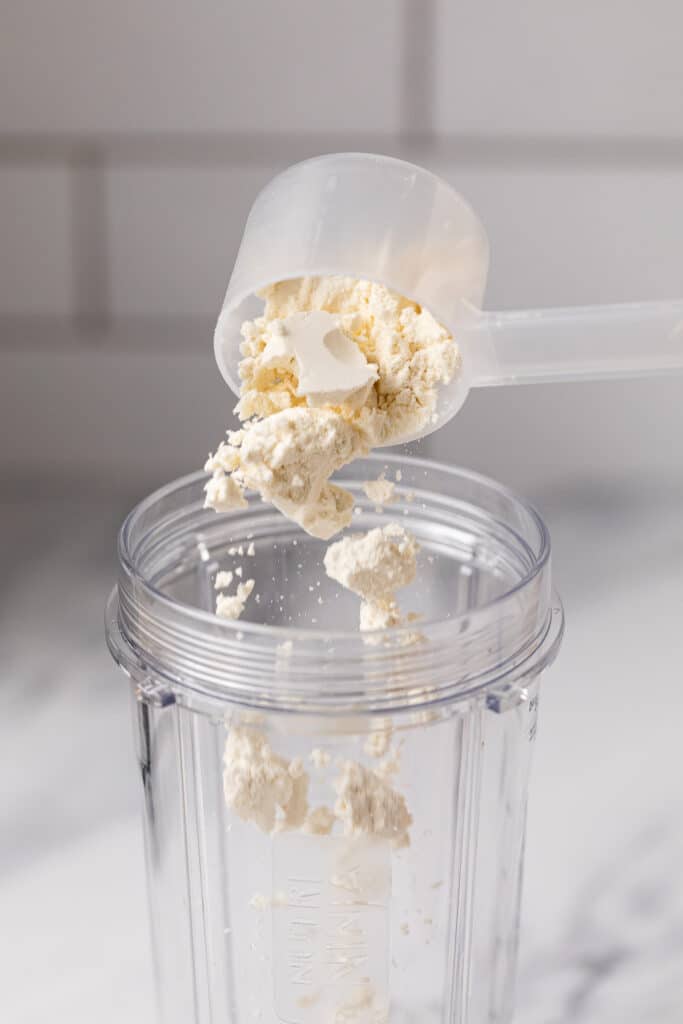
Credit: levelsprotein.com
Ingredients Needed
Making whey protein at home is simple. You need a few basic ingredients. These ingredients help you make a pure and natural whey protein.
Homemade whey protein is fresh and without additives. It is easy to digest and healthy for your body.
Milk
Milk is the main ingredient for whey protein. Use fresh or pasteurized milk for the best results. Milk provides the base for extracting whey.
Fresh milk has natural proteins. These proteins separate when heated and mixed with an acid.
Lemon Juice Or Vinegar
Lemon juice or vinegar helps in curdling the milk. They act as a natural acid. This process separates the whey from the curds.
You need only a small amount of lemon juice or vinegar. They help in breaking down the milk proteins.
Cheesecloth Or Strainer
A cheesecloth or strainer is necessary for filtering. It helps separate the liquid whey from the solid curds. Use it to drain the whey efficiently.
A fine mesh strainer also works well. It catches the curds and lets the whey pass through.
Bowl Or Container
A bowl or container collects the whey. Place it under the strainer or cheesecloth. It should be large enough to hold all the liquid.
Choose a clean and dry container. It keeps the whey fresh and safe for later use.
Optional Flavorings
You can add flavor to your whey protein. Use natural flavorings like vanilla or cocoa. These make your protein more enjoyable to drink.
Flavorings are optional but can enhance taste. They make protein shakes more delicious.
- Vanilla extract for a sweet taste
- Cocoa powder for a chocolate flavor
- Honey or maple syrup for natural sweetness

Credit: nakednutrition.com
Equipment Required
Making whey protein at home needs some special tools. These help separate whey from milk or cheese.
You can use simple kitchen items or some specific equipment to get good results.
Large Pot
A large pot is needed to heat the milk or mixture. It should be big enough to hold the liquid safely.
Use a heavy-bottom pot to avoid burning the milk during heating.
Thermometer
A thermometer helps check the temperature of the milk. Temperature control is key to making whey protein.
Keep the milk between 85°C to 90°C for the best curd formation.
Strainer Or Cheesecloth
A fine strainer or cheesecloth is used to separate the whey from the curds. Cheesecloth gives a cleaner separation.
Place the strainer over a bowl to catch the liquid whey as it drains.
Mixing Spoon Or Spatula
Use a wooden or heat-resistant spoon to stir the milk gently. Stirring helps heat the milk evenly.
Avoid metal spoons that can react with the milk and affect flavor.
Container For Storage
You need a clean container to store the whey protein after straining. Use airtight jars or bottles.
Label the containers with the date to keep track of freshness.
Step 1: Heat The Milk
Heating the milk is the first step in making whey protein. This process helps prepare the milk for curdling.
It is important to heat the milk to the right temperature. Too hot or too cold can affect the quality of the whey.
Choosing The Milk
Use fresh, whole milk for the best protein content. Avoid milk with additives or preservatives.
Whole milk has more protein and fat, which helps create richer whey protein.
Heating Temperature
Heat the milk slowly to about 85°C (185°F). This temperature helps kill bacteria and prepares milk for curdling.
Use a thermometer to check the temperature. Avoid boiling the milk as it can change the taste.
Stirring During Heating
Stir the milk gently while heating. This stops it from sticking to the pot and burning.
Continuous stirring also helps heat the milk evenly for better results.
Cooling After Heating
After heating, let the milk cool to about 40°C (104°F). This is the right temperature for adding cultures or acid.
Cooling too fast or too slow can affect the texture of the final whey protein.
Step 2: Add Acid To Curdle
After heating the milk, you need to add acid to start curdling. This step separates curds from whey.
The acid changes the milk’s pH and causes proteins to clump together. This forms solid curds and liquid whey.
Choosing The Right Acid
You can use different acids to curdle milk. Common acids are lemon juice, vinegar, or citric acid.
Each acid works well, but lemon juice is natural and easy to find. Vinegar also works quickly.
How Much Acid To Add
Add acid slowly while stirring the warm milk. Use about 2 tablespoons of acid per liter of milk.
Stop adding acid when the milk curdles and separates into clear whey and white curds.
Temperature During Curdling
Keep the milk warm at around 110°F (43°C) when adding acid. This helps curds form better.
If the milk is too hot or cold, curdling will be slow or incomplete.
Stirring The Milk
Gently stir the milk after adding acid. Stirring spreads the acid and helps curds form evenly.
Do not stir too hard. Rough stirring can break the curds into small pieces.
Step 3: Separate Curds And Whey
After adding an acid or rennet, the milk starts to form curds. These curds are solid pieces that will become cheese or protein.
Separating curds from the liquid whey is important. This step helps collect the protein part.
Let The Milk Settle
After adding the acid, let the milk rest for 20 to 30 minutes. The milk will turn into a gel-like mass.
This rest time allows curds to form fully and separate naturally from the whey.
Cut The Curds
Use a clean knife to cut the curds into small pieces. This helps whey drain faster.
- Cut vertically and horizontally
- Make about 1-inch cubes
- Be gentle to keep curds intact
Drain The Whey
Pour the curds and whey into a cheesecloth-lined strainer. Let the liquid whey drain out.
You can gently press the curds to remove more whey if needed.
Collect The Whey
Save the drained whey for other uses or discard it. Whey contains proteins and nutrients.
Keep the curds for the next steps in making whey protein powder.
Step 4: Strain The Whey
After curdling milk, you get solid curds and liquid whey. Straining the whey helps separate these parts.
This step removes the curds and leaves you with clear whey for further use or drying.
Prepare Your Straining Tools
Use a clean cheesecloth or fine mesh strainer. This stops curds from passing through.
- Choose a large bowl to catch the whey
- Place the strainer or cheesecloth over the bowl
- Make sure everything is clean to avoid contamination
Pour The Curdled Milk Slowly
Pour the curdled milk gently into the strainer. This helps the liquid whey drain out smoothly.
Let the whey drip into the bowl below without pressing the curds.
Allow Enough Time To Drain
Give the whey time to strain fully. This can take 30 minutes to an hour.
A slow drip means better separation of whey from curds.
Collect And Store The Whey
Once strained, pour the whey into a clean container. Store it in the fridge if you plan to use it soon.
- Use whey for smoothies, baking, or drying into powder
- Keep refrigerated and use within a week
- Freeze whey for longer storage
Step 5: Dry The Whey
Drying the whey is the final step in making whey protein powder. It removes water to create a fine, dry powder.
This process helps preserve the protein and makes it easy to store and use.
Spray Drying
Spray drying turns liquid whey into powder quickly. The liquid whey sprays into hot air.
The hot air evaporates the water, leaving tiny powder particles behind.
- Uses a spray nozzle to create droplets
- Dries whey in seconds
- Produces fine, consistent powder
Freeze Drying
Freeze drying freezes the whey first. Then it removes water by turning ice into vapor.
This method keeps the protein structure very intact but takes more time.
- Freezes whey quickly
- Uses low pressure to remove water
- Preserves nutrients well
Drum Drying
Drum drying spreads liquid whey on a hot metal drum. The heat dries the whey into flakes.
After drying, the flakes break into powder form.
- Uses heated drums for drying
- Produces flakes that turn into powder
- Less common for whey protein
Storage Tips
Whey protein can lose quality if not stored properly. Keeping it fresh helps maintain its taste and nutrition.
Good storage stops moisture and heat from damaging the powder. This keeps your protein safe to use longer.
Keep It In A Cool, Dry Place
Store whey protein away from sunlight and heat sources. A cupboard or pantry works well.
Heat and moisture cause clumping and spoilage. A dry area keeps the powder loose and fresh.
Use Airtight Containers
Keep whey protein in containers that close tightly. This stops air and moisture from getting inside.
Original packaging may work if resealable. Otherwise, use a clean jar or plastic container with a lid.
Avoid Refrigeration
Do not store whey protein in the fridge. Condensation can form and cause clumps.
Room temperature storage is best unless you live in a very hot or humid climate.
Check Expiry Dates Regularly
Always note the expiration date on the whey protein package. Use it before this date.
Expired protein can lose flavor and nutrition, and may cause stomach upset.
Keep Away From Strong Odors
Whey protein can absorb odors from nearby foods. Store it away from spices and strong smells.
Using sealed containers helps prevent the powder from picking up unwanted flavors.
Ways To Use Homemade Whey Protein
Homemade whey protein is a healthy ingredient you can add to your diet. It comes from milk and has many uses.
You can use whey protein in different recipes and drinks to boost nutrition. It is easy to include it in meals.
Add To Smoothies
Add homemade whey protein to your fruit or vegetable smoothies. It gives extra protein and a creamy texture.
This is a quick way to make your drinks more filling and healthy. Blend whey with your favorite ingredients.
Mix Into Oatmeal Or Cereal
Stir whey protein into hot oatmeal or cold cereal. It adds a smooth taste and helps keep you full longer.
This is an easy way to increase protein in your breakfast without changing the flavor much.
Use In Baking Recipes
Replace some flour with whey protein in recipes like pancakes, muffins, or bread. It adds nutrition and moisture.
Whey helps baked goods stay soft and adds a mild cheesy flavor to your treats.
Make Protein Shakes
Mix whey protein with water, milk, or a milk alternative to make simple protein shakes. Drink them after workouts.
These shakes help with muscle recovery and provide quick energy.
Add To Soups And Sauces
Stir whey protein into soups or sauces to boost their protein content. It blends well without changing taste much.
This is a good way to add nutrition to meals for kids or picky eaters.
Use In Salad Dressings
Whisk whey protein into salad dressings for a creamy texture and extra protein. It mixes well with oil and vinegar.
This adds flavor and nutrition without making the dressing too thick.
Credit: adpi.org
Frequently Asked Questions
What Is The Basic Process To Make Whey Protein?
Whey protein is made by separating whey from milk during cheese production. The liquid whey is filtered, concentrated, and dried into powder form for use.
How Do You Separate Whey From Milk?
Whey separates naturally when milk is curdled using enzymes or acid. The solid curds form cheese, while liquid whey is drained off.
Can Whey Protein Be Made At Home?
Yes, you can make whey protein by straining curdled milk and drying the whey liquid. However, commercial processing ensures purity and quality.
What Equipment Is Needed To Make Whey Protein?
Basic tools include milk, an acid or rennet, a strainer, and a drying method. Industrial production uses advanced filtration and spray drying for consistency.
Conclusion
Making whey protein is a simple process anyone can understand. It starts with milk and uses natural steps to separate the protein. You get a healthy powder that helps build muscles and stay fit. Knowing how it is made helps you trust the product you use.
Try to choose pure whey protein for the best results. This knowledge can guide you to better health and fitness choices.


