
Are you looking to boost your protein intake without spending a fortune on store-bought supplements? Making whey protein at home is easier than you think, and it lets you control exactly what goes into your body.
Imagine having fresh, natural whey protein ready whenever you need it—pure, affordable, and tailored to your taste. In this guide, you’ll discover simple steps to prepare your own whey protein quickly and safely. Keep reading to unlock a healthier, smarter way to fuel your workouts and daily life.

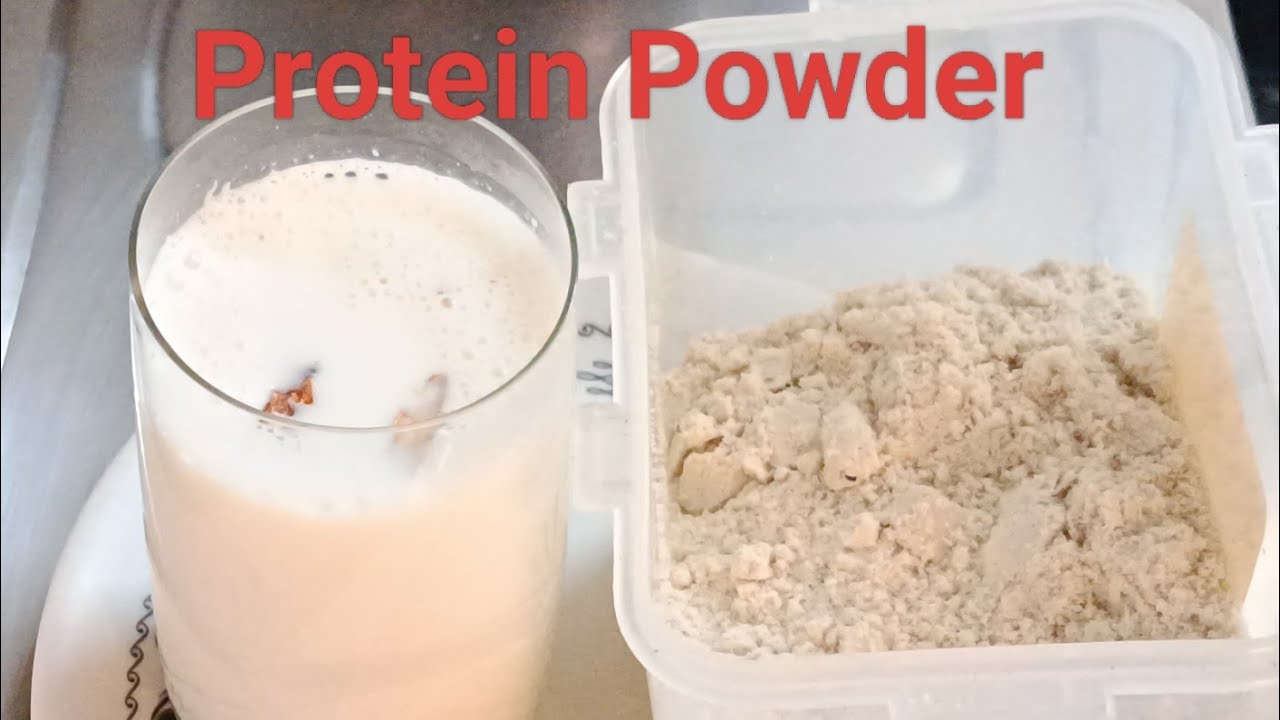
Credit: www.aol.com
Benefits Of Homemade Whey Protein
Making whey protein at home has many advantages. It is simple and cost-effective. You control what goes into your protein. This ensures purity and quality.
Homemade whey protein is fresh and free from preservatives. It can be customized to suit your dietary needs. Let’s explore more benefits.
Cost-effective
Store-bought whey protein can be expensive. Making it at home saves money. You only need basic ingredients and kitchen tools.
- Milk
- Lemon juice or vinegar
- Cheesecloth
Control Over Ingredients
You decide what goes into your whey protein. This means no additives or artificial flavors. You can keep it organic and natural.
Use fresh milk and natural acid like lemon juice. This keeps your protein pure and healthy.
Freshness And Quality
Homemade whey protein is always fresh. You make it in small batches, ensuring high quality. No preservatives mean it is healthier.
Fresh whey protein supports muscle recovery and provides essential nutrients. It is perfect for post-workout shakes.
Environmentally Friendly
Making whey protein at home reduces packaging waste. You use less plastic and support a greener planet.
Reuse containers and buy ingredients in bulk. This helps the environment and saves money.
Ingredients Needed
Making whey protein at home is simple and uses only a few ingredients. These ingredients help you get fresh and natural whey protein.
Each ingredient plays a key role in the whey protein’s quality and taste. Let’s look at what you need.
Milk
Milk is the main ingredient for whey protein. Use fresh whole milk for the best results.
You can use cow’s milk or buffalo milk. Avoid ultra-pasteurized milk because it may not curdle well.
Lemon Juice Or Vinegar
Lemon juice or vinegar helps to separate the curds from whey. This process is called curdling.
Use fresh lemon juice or white vinegar for a clean taste and good whey separation.
Water
Water is used for rinsing the curds and diluting whey if needed. Use clean, filtered water.
Salt (optional)
Salt is optional but can add flavor to the whey protein. Use a small pinch if you want.
Too much salt can change the taste of whey, so add it carefully.
Equipment Required
Making whey protein at home needs some basic tools. These tools help you separate the whey from milk easily.
Using the right equipment makes the process clean and safe. It also improves the quality of your whey protein.
Large Pot
A large pot is needed to heat the milk. Choose one that holds enough milk for your batch size.
Use a pot made from stainless steel or any non-reactive material. Avoid aluminum pots to keep taste pure.
Thermometer
A thermometer helps you check the milk temperature. Heating milk to the right temperature is important.
Milk should be heated to about 85°C (185°F) to prepare whey protein properly. A digital or dial thermometer works well.
Strainer Or Cheesecloth
You need a strainer or cheesecloth to separate the whey from curds. Cheesecloth gives finer filtration.
Place the cheesecloth over a bowl or container. Pour the curdled milk slowly to drain whey liquid.
Large Bowl Or Container
Use a large bowl to catch the whey liquid. Make sure it is clean and dry before use.
Stainless steel or glass bowls are best. They do not react with the whey.
Stirring Spoon
A long spoon helps stir the milk while heating. Use a wooden or stainless steel spoon.
Stirring prevents milk from sticking to the pot. It also helps mix the milk evenly.
Storage Containers
Store the whey protein in clean, airtight containers. This keeps it fresh for longer.
Glass or BPA-free plastic containers work well. Label them with the date for easy tracking.
Step-by-step Preparation
Whey protein is a healthy supplement made from milk. You can prepare it at home using simple steps.
This guide shows how to make whey protein by separating curds and whey from milk.
Heating The Milk
Start by pouring fresh milk into a large pot. Heat the milk gently on medium heat.
Heat until it reaches about 85°C (185°F). Stir often to avoid burning.
Adding Acid To Curdle
Remove the milk from heat. Add a natural acid like lemon juice or vinegar slowly.
Stir gently to help the milk curdle. Curds and whey will start to separate quickly.
- Use 2 tablespoons of lemon juice or vinegar per liter of milk
- Add acid slowly while stirring
- Let the mixture sit for 5 to 10 minutes
Straining The Curds
Place a clean cheesecloth or fine mesh strainer over a bowl. Pour the curdled milk into it.
Let the liquid drain out. The solid parts left are curds, used for cheese or other recipes.
- Line strainer with cheesecloth
- Pour curdled milk slowly
- Let drain for 15-20 minutes
Collecting The Whey
The liquid collected in the bowl is whey. It contains protein and nutrients.
Transfer the whey to a clean container. Store it in the refrigerator for later use.
- Use whey fresh or keep refrigerated
- Whey can be added to smoothies or baked goods
- Discard if it smells sour or bad
Storing Whey Protein
Storing whey protein properly keeps it fresh and safe to use. Good storage stops moisture and bacteria from growing.
Follow simple tips to keep your homemade whey protein dry and tasty for longer.
Use An Airtight Container
Put your whey protein in a clean, dry container with a tight lid. This stops air and moisture from getting in.
Plastic or glass containers with seals work well for storing whey protein.
Keep It In A Cool, Dry Place
Store whey protein away from heat and sunlight. Warmth and light can spoil the protein quickly.
A kitchen cabinet or pantry is a good place if it stays cool and dry.
Avoid Moisture Exposure
Moisture causes whey protein to clump and spoil. Keep the container dry inside and out.
Use a dry spoon every time you scoop whey protein to stop adding water.
Label Your Whey Protein
Write the date you made the whey protein on the container. This helps track freshness.
Use the protein within 1 to 2 weeks for best taste and quality.
Ways To Use Fresh Whey
Fresh whey is a nutritious byproduct of cheese or yogurt making. It contains protein, vitamins, and minerals that support health.
You can use fresh whey in many simple recipes. It adds flavor and nutrients to your meals and drinks.
Protein Shakes
Fresh whey is excellent for protein shakes. It blends well with fruits and other ingredients to make a healthy drink.
Use fresh whey instead of water or milk to increase protein content. It helps muscle growth and recovery.
- Mix fresh whey with banana and peanut butter
- Add whey to chocolate powder and milk
- Blend whey with berries and spinach
- Use fresh whey as a base for your shake
Baking Recipes
Fresh whey works well in baking. Replace water or milk with whey in bread, muffins, or pancakes.
The natural proteins and acids in whey improve dough texture and add flavor. It makes baked goods moist and soft.
- Use whey in bread dough for better rise
- Add whey to pancake batter for fluffiness
- Replace milk with whey in muffin recipes
- Use whey to make homemade crackers
Smoothies And Soups
Add fresh whey to smoothies for extra protein and a mild tangy taste. It blends smoothly with fruits and vegetables.
Use whey in soups as a broth base or to enrich creamy soups. It adds nutrients and a slight flavor boost.
- Blend whey with mango and yogurt for a smoothie
- Mix whey with spinach and apple for green smoothies
- Use whey as stock in vegetable soups
- Add whey to creamy potato or pumpkin soup
Tips For Best Results
Making whey protein at home can save money and ensure freshness. Follow simple tips to get the best quality whey.
These tips help you prepare whey protein that is clean, rich, and easy to use in recipes.
Use Fresh Milk
Start with fresh, high-quality milk for better whey protein. Fresh milk contains more nutrients and less bacteria.
Choose whole milk or low-fat milk based on your preference. Avoid ultra-pasteurized milk for better results.
Heat Milk Slowly
Heat milk slowly over low to medium heat. This prevents burning and keeps milk proteins intact.
Stir the milk gently as it heats to avoid sticking to the pan.
Add Acid Carefully
Add lemon juice or vinegar slowly to the hot milk. This helps separate whey from curds without damaging proteins.
- Use about 2 tablespoons of acid per liter of milk
- Add acid drop by drop while stirring gently
- Stop adding acid once curds fully separate
Strain Using Fine Cloth
Use a fine cheesecloth or muslin cloth to strain the whey from the curds. This gives clear liquid whey.
Let the whey drain naturally. Avoid squeezing the cloth to keep whey smooth and less cloudy.
Store Whey Properly
Store whey protein in a clean, airtight container in the refrigerator. Use within a week for best taste.
- Label container with date
- Keep whey cold to prevent spoilage
- Freeze whey for longer storage
Dry Whey For Powder
To make whey protein powder, dry the liquid whey slowly. Use a dehydrator or dry in a warm, clean area.
Break dried whey into small pieces and grind into powder. Store powder in a dry, airtight container.

Credit: justingredients.us

Credit: seeqsupply.com
Frequently Asked Questions
What Ingredients Do I Need To Prepare Whey Protein At Home?
You need milk, lemon juice or vinegar, a strainer, and a bowl. Milk is boiled and curdled using lemon juice to separate whey.
How Long Does It Take To Make Homemade Whey Protein?
The process takes about 30 to 40 minutes, including boiling and straining. Cooling time may add extra minutes depending on room temperature.
Is Homemade Whey Protein As Effective As Store-bought?
Homemade whey is natural and free from additives but may lack flavor variety. It retains essential proteins and nutrients beneficial for muscle recovery.
How Do I Store Homemade Whey Protein Safely?
Store whey in a clean, airtight container in the refrigerator. Use within 3 to 5 days to maintain freshness and prevent spoilage.
Conclusion
Making whey protein at home saves money and ensures purity. You control the ingredients and avoid additives. The process is simple and uses common kitchen tools. Fresh whey protein supports muscle growth and recovery well. Try different flavors to keep it interesting.
Consistency matters for best results. Enjoy your homemade whey as part of a healthy routine. It’s a smart choice for fitness and wellness. Keep experimenting and find what works best for you. Homemade whey protein can fit easily into your daily life.


